> ## Documentation Index
> Fetch the complete documentation index at: https://docs.poble.com.au/llms.txt
> Use this file to discover all available pages before exploring further.
# Select Item Options
> Choose the customer’s preferred options when adding an item to an order.
Choose the customer’s preferred options when adding an item to an order.
**Where:** POS device → sales screen → menu item
Choose a menu item with pre-configured options. Its available option groups appear in a window.
Select the required choices, such as **Hot** or **Iced**. Review any additional prices and the selection limit displayed for each group.
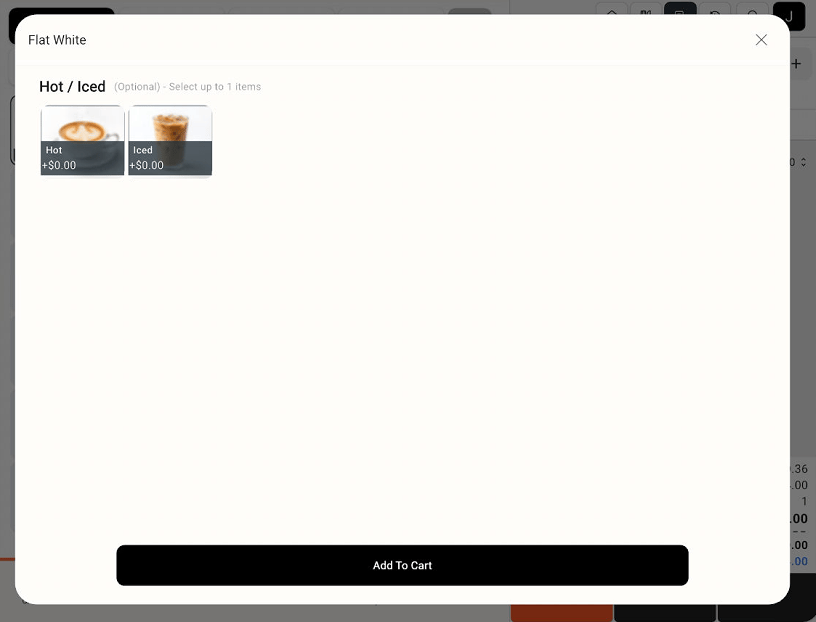 Select **Add To Cart**, then check the item and selected options in the order panel.
The options shown depend on the groups assigned to that menu item.
## Related guides
* [Configure option mapping](/poble-manual/menu-management/configuration/option-mapping)
* [Use the sales screen](/poble-manual/sales-payments/sales-screen)
This documentation is built and hosted on [Mintlify](https://mintlify.com), a developer documentation platform.
Select **Add To Cart**, then check the item and selected options in the order panel.
The options shown depend on the groups assigned to that menu item.
## Related guides
* [Configure option mapping](/poble-manual/menu-management/configuration/option-mapping)
* [Use the sales screen](/poble-manual/sales-payments/sales-screen)
This documentation is built and hosted on [Mintlify](https://mintlify.com), a developer documentation platform.