> ## Documentation Index
> Fetch the complete documentation index at: https://docs.poble.com.au/llms.txt
> Use this file to discover all available pages before exploring further.
# Access a Store Menu
> Select a store and view the menu items available at that location.
Select a store and view the menu items available at that location.
**Where:** Backoffice → selected store → POS → Menu Settings
Use the company/store selector to select the location you want to manage. Check the store name displayed in the header.
 Go to **POS → Menu Settings**. The categories and menu items shown are associated with the selected store.
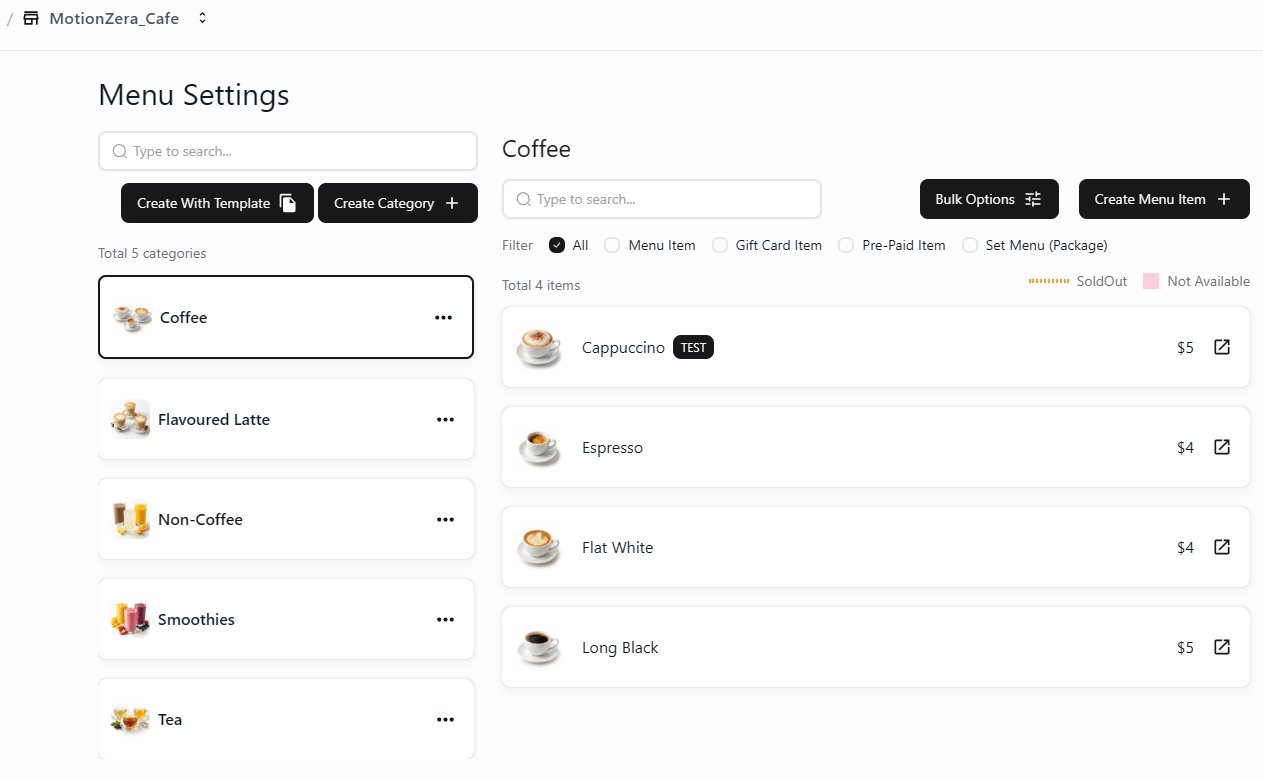 Check the store name before editing prices or adding items for a franchise location.
## Related guides
* [Create store categories](/poble-manual/menu-management/store/create-categories)
* [Add and edit store items](/poble-manual/menu-management/store/manage-items)
This documentation is built and hosted on [Mintlify](https://mintlify.com), a developer documentation platform.
Check the store name before editing prices or adding items for a franchise location.
## Related guides
* [Create store categories](/poble-manual/menu-management/store/create-categories)
* [Add and edit store items](/poble-manual/menu-management/store/manage-items)
This documentation is built and hosted on [Mintlify](https://mintlify.com), a developer documentation platform.