> ## Documentation Index
> Fetch the complete documentation index at: https://docs.poble.com.au/llms.txt
> Use this file to discover all available pages before exploring further.
# Manage Item Options on the POS
> Create and organise option groups and choices on the POS.
Create and organise option groups and choices on the POS.
**Where:** POS device → Menu Management → Option Setup
Select **Option Setup** from the menu management sidebar.
Select a group to view its choices. Use the **+** button beside **Options Group** to begin adding another group.
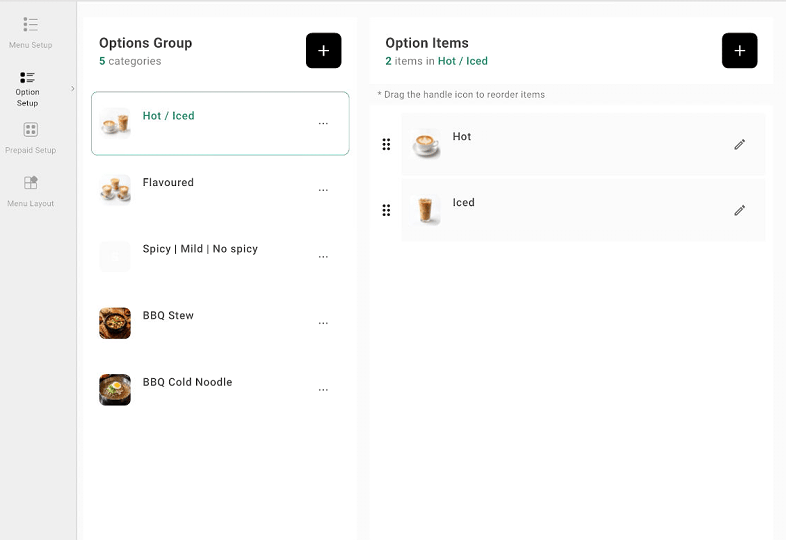 Use the **+** button beside **Option Items** to add a choice. Use the edit icon beside an existing choice to update it, and drag its handle to change the order.
Use **Option Mapping** to assign the option groups to the items that should offer them.
## Related guides
* [Assign options to items](/poble-manual/menu-management/configuration/option-mapping)
* [Create options in the backoffice](/poble-manual/menu-management/company/create-options)
This documentation is built and hosted on [Mintlify](https://mintlify.com), a developer documentation platform.
Use the **+** button beside **Option Items** to add a choice. Use the edit icon beside an existing choice to update it, and drag its handle to change the order.
Use **Option Mapping** to assign the option groups to the items that should offer them.
## Related guides
* [Assign options to items](/poble-manual/menu-management/configuration/option-mapping)
* [Create options in the backoffice](/poble-manual/menu-management/company/create-options)
This documentation is built and hosted on [Mintlify](https://mintlify.com), a developer documentation platform.