> ## Documentation Index
> Fetch the complete documentation index at: https://docs.poble.com.au/llms.txt
> Use this file to discover all available pages before exploring further.
# Manage Discount Settings
> Create discount options for your POS from the company backoffice.
Create discount options for your POS from the company backoffice.
**Where:** Backoffice → company view → POS → POS Settings → Discount Options
Select your main company, then open **POS → POS Settings**. Find **Discount Options**.
Open the form for adding a discount option. Enter **Name** and **Description**, then choose **Rate** or **Amount** under **Type**.
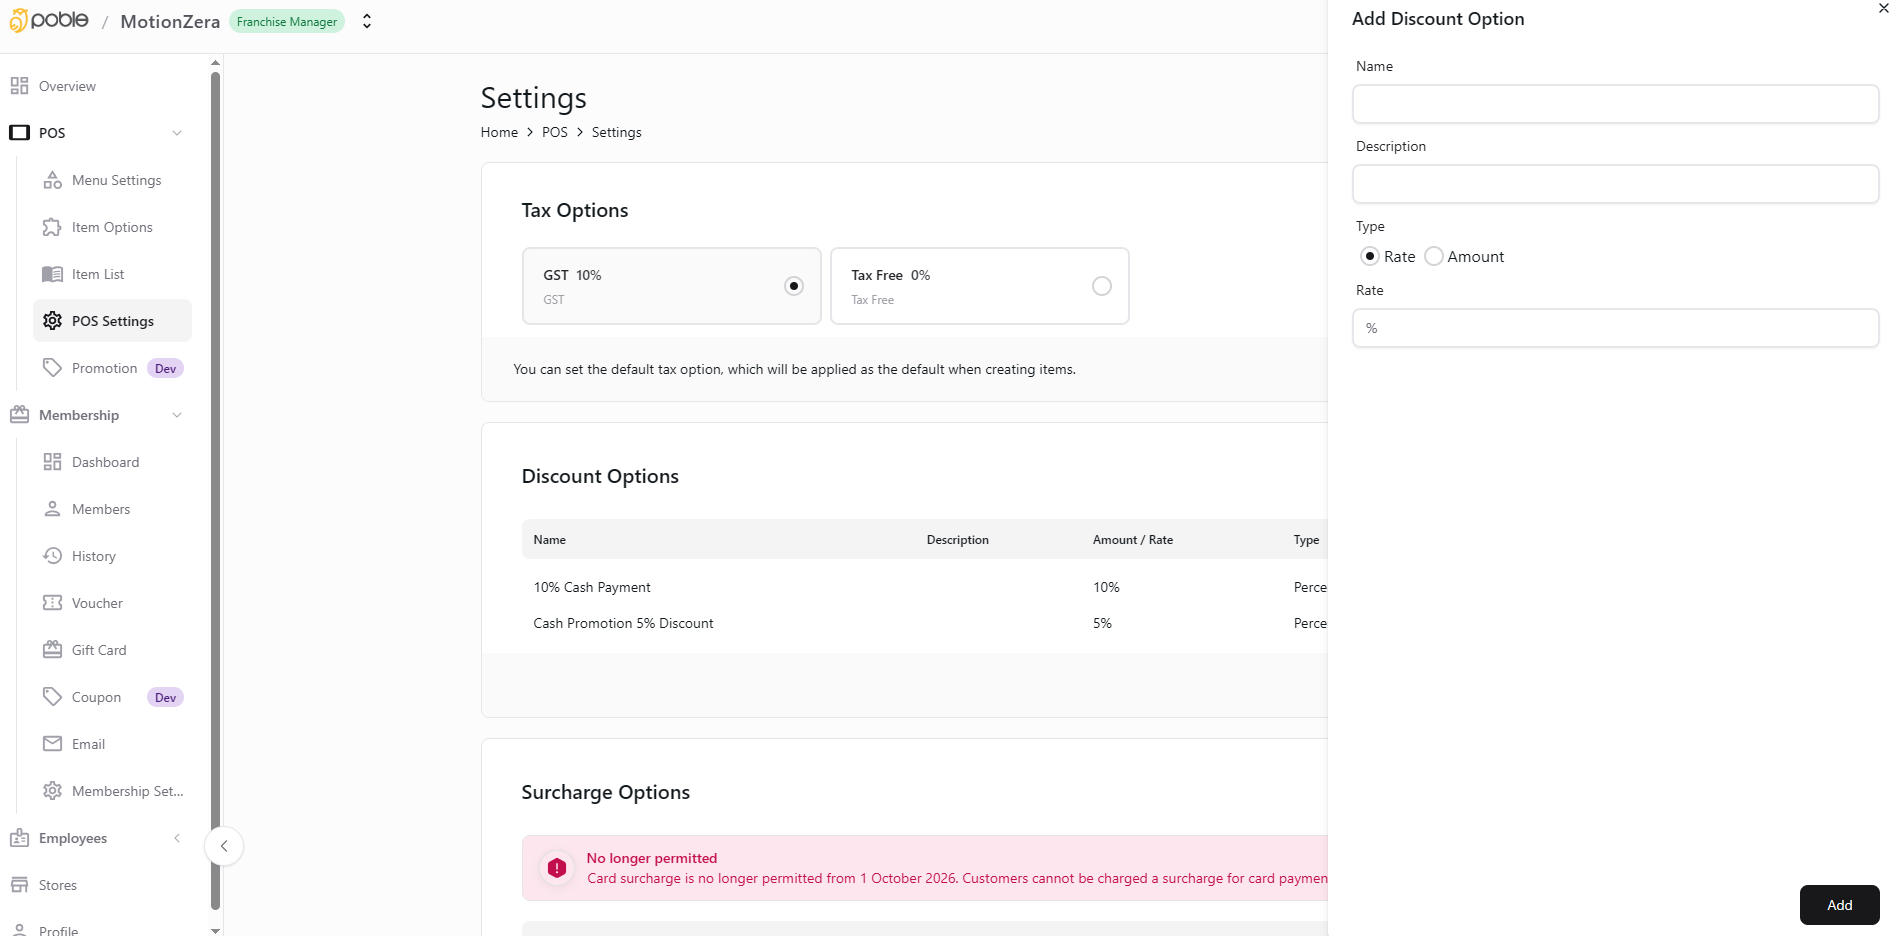 Enter the discount rate or amount for the selected type. Review the details and select **Add**.
Check the entry in **Discount Options** and review existing options when changes are needed.
Use a descriptive name so staff can identify the correct discount at checkout.
## Related guides
* [Apply item discounts and add notes](/poble-manual/sales-payments/item-discounts-notes)
This documentation is built and hosted on [Mintlify](https://mintlify.com), a developer documentation platform.
Enter the discount rate or amount for the selected type. Review the details and select **Add**.
Check the entry in **Discount Options** and review existing options when changes are needed.
Use a descriptive name so staff can identify the correct discount at checkout.
## Related guides
* [Apply item discounts and add notes](/poble-manual/sales-payments/item-discounts-notes)
This documentation is built and hosted on [Mintlify](https://mintlify.com), a developer documentation platform.