> ## Documentation Index
> Fetch the complete documentation index at: https://docs.poble.com.au/llms.txt
> Use this file to discover all available pages before exploring further.
# Set Up Your Store
> Create your first store and add its details and logo.
After creating your company, set up the first store linked to your POBLE account.
## Set Up Your Store
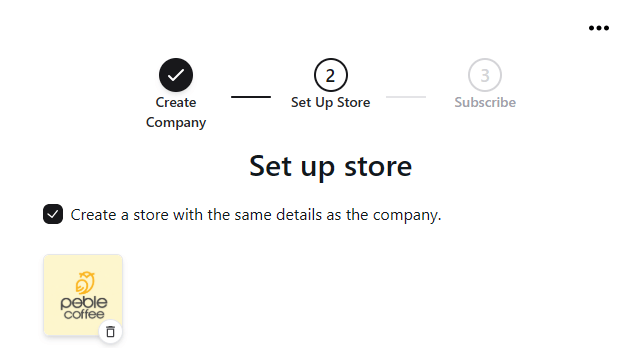
On **Set up store**, use **Create a store with the same details as the company** when your store and company share the same details. If they differ, clear the checkbox and enter your store details.
Use the logo upload control to add an image for your store.
Check that the details belong to the location you are setting up, then continue to the subscription stage of the setup flow.
 You can create additional locations later from **Stores** using **Add Store**.
## Related guides
* [Choose your plan](/poble-manual/getting-started/choose-your-subscription-plan)
* [Manage stores](/poble-manual/company-settings/manage-stores)
This documentation is built and hosted on [Mintlify](https://mintlify.com), a developer documentation platform.
You can create additional locations later from **Stores** using **Add Store**.
## Related guides
* [Choose your plan](/poble-manual/getting-started/choose-your-subscription-plan)
* [Manage stores](/poble-manual/company-settings/manage-stores)
This documentation is built and hosted on [Mintlify](https://mintlify.com), a developer documentation platform.