> ## Documentation Index
> Fetch the complete documentation index at: https://docs.poble.com.au/llms.txt
> Use this file to discover all available pages before exploring further.
# 매장 메뉴 열기
> 매장을 선택하고 해당 지점에서 사용할 수 있는 상품을 확인합니다.
매장을 선택하고 해당 지점에서 사용할 수 있는 상품을 확인합니다.
**경로:** 관리 화면 → 선택한 매장 → POS → Menu Settings
회사·매장 선택기에서 관리할 지점을 선택하고 헤더에 표시된 매장명을 확인하세요.
 **POS → Menu Settings**로 이동하세요. 선택한 매장에 연결된 카테고리와 상품이 표시됩니다.
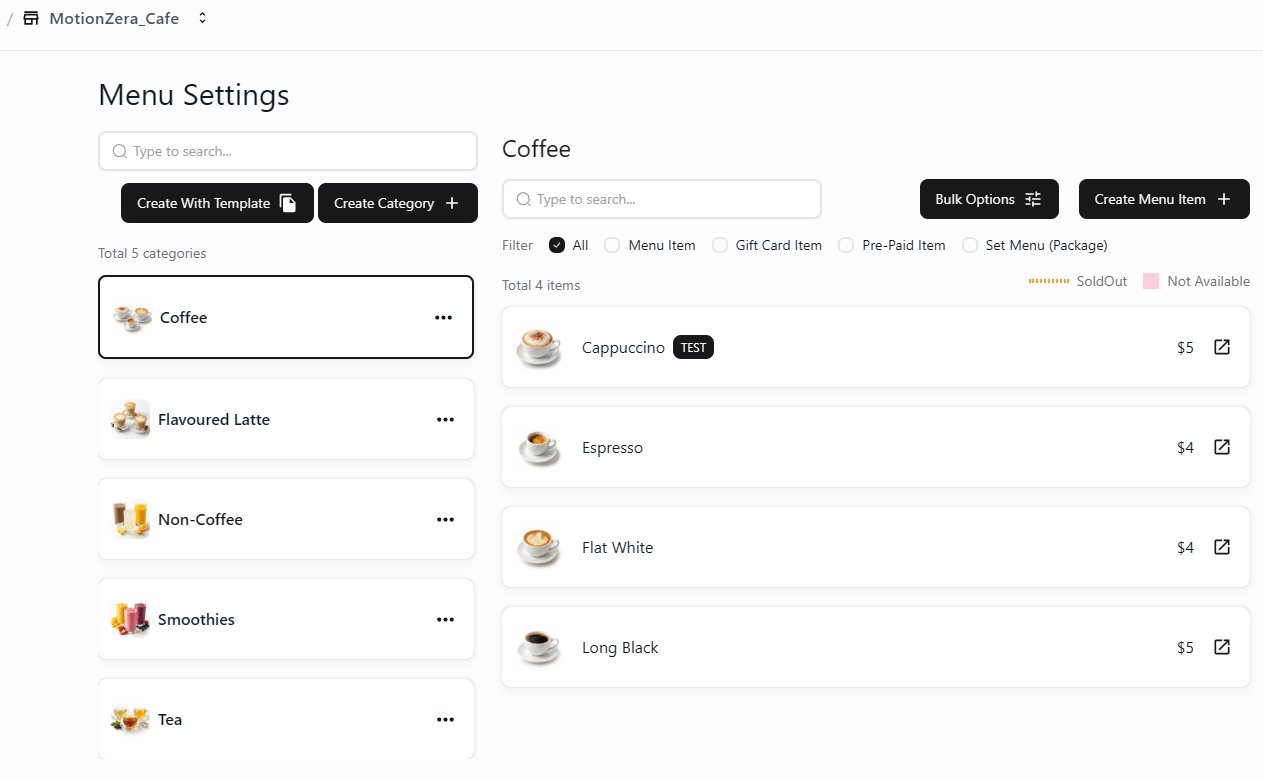 가맹점의 가격을 수정하거나 상품을 추가하기 전에 매장명을 확인하세요.
## 관련 가이드
* [매장 메뉴 카테고리 만들기](/ko/poble-manual/menu-management/store/create-categories)
* [매장 메뉴 상품 추가 및 수정](/ko/poble-manual/menu-management/store/manage-items)
This documentation is built and hosted on [Mintlify](https://mintlify.com), a developer documentation platform.
가맹점의 가격을 수정하거나 상품을 추가하기 전에 매장명을 확인하세요.
## 관련 가이드
* [매장 메뉴 카테고리 만들기](/ko/poble-manual/menu-management/store/create-categories)
* [매장 메뉴 상품 추가 및 수정](/ko/poble-manual/menu-management/store/manage-items)
This documentation is built and hosted on [Mintlify](https://mintlify.com), a developer documentation platform.