> ## Documentation Index
> Fetch the complete documentation index at: https://docs.poble.com.au/llms.txt
> Use this file to discover all available pages before exploring further.
# POBLE 계정 만들기
> 회사 및 사업자 정보를 입력해 POBLE 설정을 시작합니다.
POBLE 설정 과정의 **Create company** 화면부터 시작하세요. 사업자 정보와 기본 연락처를 준비하세요.
## POBLE 계정 만들기
**Australian Business Number (ABN)**, **Business Name**, **Business Id**를 입력하세요.
사업장에 맞는 식별자를 사용하세요. 설정 화면 안내에 따르면 이 값은 회사 고유 식별자이며 멤버십 URL의 하위 도메인으로 사용됩니다.
**Address**, **City**, **State**, **Postcode**, **Primary Email**, **Primary Contact**를 입력하세요.
**Terms and Conditions**를 확인하세요. 동의하면 확인란을 선택한 뒤 **Next**를 누르세요.
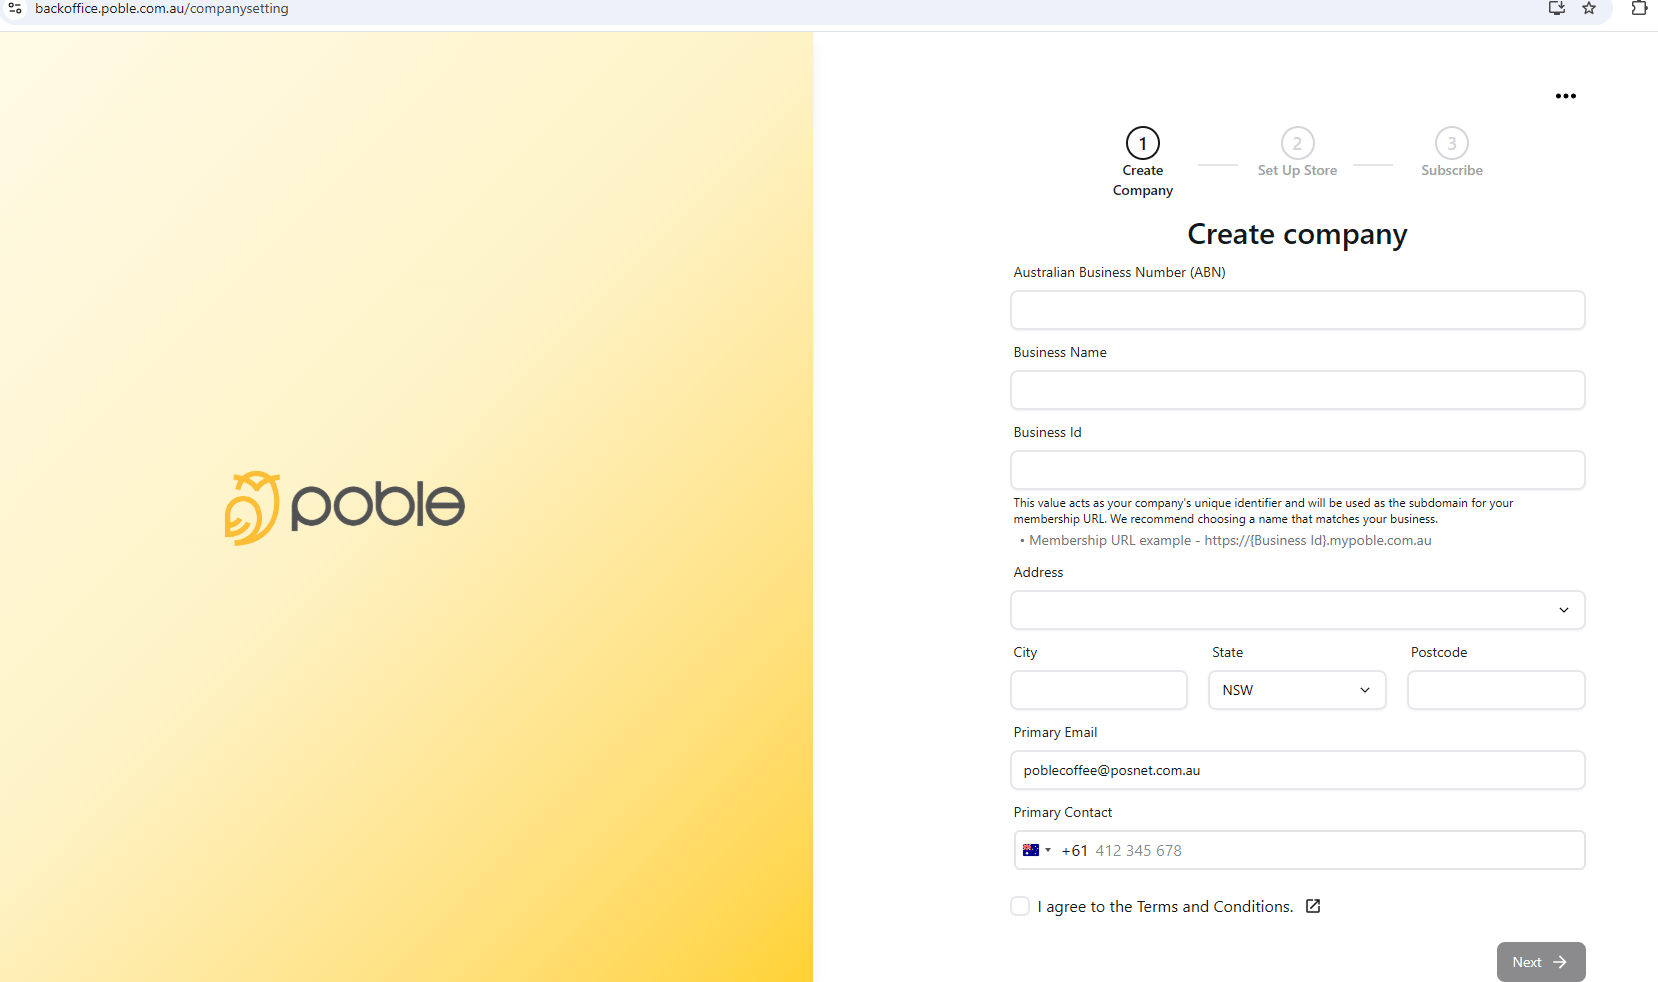 고객이 멤버십 URL에서 Business Id를 볼 수 있으므로 계속하기 전에 신중하게 확인하세요.
## 관련 가이드
* [매장 설정](/ko/poble-manual/getting-started/set-up-your-store)
This documentation is built and hosted on [Mintlify](https://mintlify.com), a developer documentation platform.
고객이 멤버십 URL에서 Business Id를 볼 수 있으므로 계속하기 전에 신중하게 확인하세요.
## 관련 가이드
* [매장 설정](/ko/poble-manual/getting-started/set-up-your-store)
This documentation is built and hosted on [Mintlify](https://mintlify.com), a developer documentation platform.